Sunday, October 14, 2012

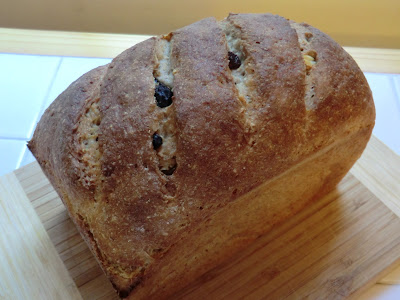
Apricot & Hazelnut Benoîtons


Benoîtons are French small rectangular shaped rolls, most often flavoured with nuts and raisins. They are traditionally made with rye flour (or a mix of rye and white flours). 

Forever on the lookout for new breakfast ideas for workdays (see Breakfast Fruit bread), i'll be taking these to work filled with butter and jam or with peanut butter. I have to admit though, they are probably best fresh out the oven with a generous spreading of good butter :-) 

Makes 8 benoîtons

Ingredients

-100g light rye flour
-200g white bread flour
-1 tsp quick yeast
-1 tsp salt
-150ml milk
-100ml water
-70g chopped dried apricots
-40g chopped hazelnuts

1. Warm the milk in a small saucepan (do not boil) then leave to cool to room temperature.
2. In a large bowl, combine the flours, salt, and yeast. Pour in the milk and mix, adding enough water just to bring the dough together. Knead for 10 minutes (by hand or in a mixer with dough-hook attachment), until smooth and elastic. Tip in the apricots and hazelnuts and knead again until incorporated.
3. Put the dough into a greased bowl and leave to prove in a warm spot for 1 hour or until doubled in size. 
4. On a floured surface, flatten out the dough into a rectangle roughly 30cm x 20cm and 2cm thick. Cut into 5 strips from top to bottom then cut once along the width to form 10 benoîtons. Transfer to 2 lined / greased baking sheets and leave to rise for 15 - 20 minutes. Meanwhile preheat the oven to 220C.
5. Once risen, brush the benoítons with water and bake for 15 - 20 minutes or until golden and crisp. 

Sunday, September 2, 2012

Plum Jam Tart

This summer I made nearly 4kg of jam whilst on holiday in France, thanks to a tree laden with small golden plums at the bottom of my Mum's garden. I could have made much more, if only I had the time and the means to transport it back to London. Anyway, so now I have a healthy stock of home-made plum jam. It's lovely, but I do like to vary the flavour of jam I have on my toast... and who knows how long it would take me to eat my way through 4kg of jam. So I was looking for alternative ways to use up the stock of plum jam to make way for the other types of jam I have yet to open. A jam tart seemed ideal. 
The pastry used for this tart is based on a method which uses self raising flour, more egg and less butter. The result is a lighter, cake-like crust. I used orange flavoured liqueur and some vanilla sugar to flavour the pastry, and almonds sprinkled on the top of the tart for some crunch, but you can vary these ingredients to taste. This recipe yields more pastry than is needed; you could either save (or freeze) the rest of the pastry, or use a larger tin (for a larger but thinner tart). 

Serves 6

Ingredients

Pastry

-400g self raising flour
-100g butter, cubed
-100g caster sugar (I used 30g vanilla sugar and 70g plain caster sugar)
-2 eggs
-30 ml orange liqueur (or other such as rum)
-Water (if required)

Filling

-450g jam (preferably home-made!)
-1 tbsp flaked almonds
-1 tsp sugar (optional)
-Milk for glazing

1. Grease a 23cm tin and keep in the fridge until needed.
2. In large bowl mix together the dry pastry ingredients and add the butter, use your fingertips to work in the butter until the mixture resembles breadcrumbs. Make a well in the centre and crack in the eggs, and use a knife or metal spoon to mix. Slowly pour in the liqueur to bring the pastry together (add water if required). Bring the pastry together into a ball, cover in cling film and chill for at least 30 minutes.
3. Preheat oven to 180C. Dust a work surface with flour and roll out enough pastry to line the greased tin (to about 5mm thickness). Push the pastry down into the tin, trim the edges and prick with a fork. Spoon the jam onto the pastry and spread evenly over the tart. Use some of the pastry trimmings to create a lattice and place this on the tart. Sprinkle over the almonds, brush the lattice with milk and sprinkle over the teaspoon of sugar.
4. Bake for 20 - 30 minutes or until golden. Leave to cool slightly before eating, the jam gets extremely hot!

Sunday, August 19, 2012

Beetroot Bhaji

We have been getting lovely fresh beetroot in our weekly organic veg box delivery for a few weeks in a row now, and I was running out of ideas of what to do with it. I didn't want it to end up like the potatoes which we don't really eat much of, which are usually still left over at the end of the week (when we receive yet more of them). 

So I experimented and made them into bhajis, mixed with some red onion and lots of spices. I'm not sure if they are traditional at all, but they are perfect for picnics dipped into a minty raita, or stuffed into a chapati with some crunchy lettuce, tomato, cooling yoghurt and a chutney of some kind. 

Makes 20 - 25 bhaji

Ingredients

-1 bunched beetroot (roughly 500g), tops trimmed and left in their skins
-1 large red onion
-200g gram (chickpea) flour
-200ml fizzy water
-1/2 tsp bicarbonate of soda
-1 tsp salt
-1 tsp nigella (jalonji) seeds
-1 tbsp cumin seeds - lightly toasted in a dry pan, then crushed
-1 tsp coriander seeds - lightly toasted in a dry pan, then crushed
-1 tsp ground turmeric
-1 tbsp good garam masala (I used madras)
-2 cloves garlic, peeled and crushed
-2cm chunk of fresh ginger, peeled and finely chopped
-1 chopped red chilli, fresh or dried (optional)
-1 tbsp chopped fresh mint

-Sunflower oil for deep frying (about 750 ml)

1. Firstly give the beetroot a good scrub, then coarsely grate into a large bowl (or use appropriate attachment on your food processor).  Then peel and finely slice the red onion, tip into the bowl with the beetroot and put to one side.
2. In a separate bowl, sieve in the gram flour then mix in the remaining ingredients (apart from the oil and the fizzy water). Make a well in the centre of the mix, then start to incorporate the fizzy water, mixing with a fork. Add just enough to form a thick batter, then pour this onto the beetroot/ red onion and mix thoroughly.
3. In a large, deep frying pan, pour in the oil to about 5cm deep. Gently heat until it is hot enough that when you sprinkle flour into it, it sizzles.
4. Take tablespoons of the mix and lower gently into the hot oil, several at a time. Cook for 3 - 4 minutes or until the bottom starts to crisp, then carefully flip over. 


When they are crispy all over remove from the oil and drain on kitchen paper while you fry the rest.
Delicious served hot or cold. 

Saturday, August 11, 2012

Truffle & Mushroom Ravioli


I love filled pasta and really don't make enough of it. I have a pasta machine but it is one of those things that has been stored out of reach above the cupboards in the kitchen, and has ended up being neglected. However, recently I've been watching Michela Chiappa's 'Simply Italian' series on TV which inspired me to dust off the old pasta machine. To honour its outing I decided to open the jar of truffle paste I had been saving.

For a special occasion these ravioli are delicious served with a light sauce of olive oil & garlic. I served them with a rocket & roasted fennel salad and some nice chilled white wine.

Serves 4

Ingredients

For the pasta

-300g '00' flour
-3 eggs

-Semolina, for dusting

For the filling

-250g ricotta
-250g mushrooms (I used a mix of chestnut and shitake mushroom)s
-1tbsp black truffle paste (or more to taste!)

For the 'sauce'

-100 ml good olive oil
-2 cloves of garlic
-Grated parmesan style cheese, torn fresh basil, to serve

1. To make the pasta, tip the flour onto a work surface or into a large bowl and make a well in the centre. Crack in the eggs and gradually work them into the flour using a fork. When the mixture is starting to come together, use your hands to knead the dough for 10 minutes or until smooth. Wrap the dough in cling film and chill for 30 minutes.
2. Meanwhile make the filling. Finely chop the mushrooms and fry in a glug of oil over a medium-high heat, until all their water is cooked out and they start to brown. Leave to cool. In a bowl, mix the ricotta with the truffle paste and mushrooms and season to taste. Chill until needed.
3. Dust your work surface with flour and either use a pasta machine or rolling pin to roll out your pasta dough to about 1mm thick. The dough should be worked well so that you get a smooth, almost translucent sheet of pasta. You need to keep the sheet of pasta dusted with flour and work quickly to prevent it drying out.
4. Have ready trays dusted with semolina to place the finished ravioli on. If you have used a pasta machine you will have 1 or several long rectangles of pasta, ideally this is what you are looking to achieve if you have used a rolling pin. Take the filling and place teaspoonfuls of it every 2-3cm along one side of the pasta sheet. Brush the edges and between the spoonfuls of filling with water. Carefully fold the other side of the pasta sheet over the filling. Press down and make sure no air is trapped in with the filling. Use a knife or pastry cutter to cut the ravioli and place on the trays dusted with semolina. Cover with cling film and chill until needed (you can also freeze them at this point).
5. Peel and finely slice the garlic. Heat the olive oil in a small pan and gently fry the garlic.
6. Bring a large pan of salted water to the boil, and gently slide the ravioli in. They will take under 5 minutes to cook so make sure you are ready to eat!
7. When the ravioli are cooked to your liking, very gently drain them. Transfer to heated plates, drizzle over the garlic oil, sprinkle with the cheese and basil, a little salt, and lots of cracked black pepper. 


As it has been a while, i'm submitting this to Presto Pasta Nights, this week hosted by Briciole

Tuesday, May 1, 2012

Breakfast Fruit Breads

This month I am hosting the Fresh From The Oven challenge. I had a long think about what to make and decided on breakfast fruit breads. Now, for me there are two types of breakfast breads. You've got the rich, buttery, sugary and indulgent kind. Which, don't get me wrong, are lovely once in a while. But then you have the more wholesome fruit breads, which I feel less guilty about eating for breakfast and which I find are more suited for weekday working breakfasts. This is what I have gone for here, but feel free to make your favourite breakfast fruit bread, whatever the type! I like to make a few loaves at a time, slice them, and freeze them. Then I can grab a few slices at a time to toast or defrost and to take to work.


I would usually use a 50/50 mix of wholemeal/ strong white flours but alas I had run out of wholemeal flour this time, so I used mostly white flour but added a bit of dark rye flour. This bread also has oats, peanuts, seeds, raisins and chopped prunes but you can use whatever you have handy. I have made a dried fig and walnut bread before which was lovely and also dried cherries and almonds make a nice fruit bread.


For details of how to take part in the challenge visit Utterly Scrummy blog, this is also where this month's roundup will be posted at the end of May. Happy Baking!


Healthy breakfast fruit bread


Makes 1 loaf


Ingredients


-250g strong white flour
-250g strong wholemeal flour (or a mix of flours)
-25g nuts / seeds
-75g prunes, chopped
-50g rolled oats
-350ml warm water
-2 tbsp natural yoghurt
-1 - 2 tbsp maple syrup or honey
-1 tsp quick yeast
-1/2 tsp salt
-Milk for glazing


1. Combine the flours, oats, yeast and salt in a large bowl then add the yoghurt and maple syrup/ honey. Slowly add the water and combine until it starts to come together- you may not need it all.
2. Use the dough hook of your food mixer to work the dough for 5 - 10 minutes or until smooth (or knead by hand).
3. Place the ball of dough in an oiled bowl, cover with cling film and leave to rise in a warmish place until doubled in size.
4. Punch down the dough and use your hands to spread it out into a 30  x 20 rectangle (roughly). Sprinkle the dried fruit and nuts and seeds evenly over the dough. Taking the longest side, roll up tightly then fold under the side. Place in a greased loaf tin and leave again to rise until doubled in size. Meanwhile pre-heat the oven to 220C.
5. When the dough is ready use a sharp knife to slash the dough, then brush with milk. Bake for 10 minutes at 220c then turn the oven down to 200C and bake for a further 20 - 30 minutes, or until golden and 'hollow sounding'.


Enjoy with butter and/ or your favourite jam.


Wednesday, April 4, 2012

Hot Cross Bun Rogue Gallery


I have just made hot cross buns for the first time and have discovered that, although the dough itself is quite straightforward, there is definitely a knack to the cross lattice... The cross mixture is made from flour, water and melted butter which is whisked together then spooned into a piping bag. Then you are let loose on the buns just before baking them. I obviously wasn't ready and I think I made my mixture too thin so I had to be quick... anyway it has created some interesting patterns :-)

'Rustic' would be the kindest way of describing this one


... and this one....


Success!
Happy Easter!

Monday, February 13, 2012

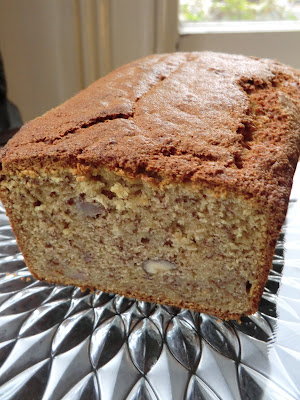
Banana & Hazelnut Cake

I have been experimenting with chestnut flour recently, it makes gives this cake an extra nutty flavour. To make a good banana cake the bananas need to be really ripe, ideally you need to wait until they start to turn brown -personally this is how I like them anyway as I find they have more flavour.


Ingredients


-3 very ripe bananas, peeled and mashed
-100g self raising flour
-100g chestnut flour (or another 100g self raising flour)
-1 tsp baking powder
-2 eggs, beaten
-75g caster sugar
-50g hazelnuts, chopped or bashed


1. Grease and line a 500g loaf tin. Make sure all of the ingredients are at room temperature.  Preheat oven to 180C.
2. Combine the flours and baking powder and put to one side. In a large bowl cream the butter and sugar together until light and fluffy then gradually add in the egg, mixing well after each addition. Fold in the flour mix until just combined, then mix in the mashed banana and hazelnuts.
3. Pour the mix into the cake tin and bake for 45 mins - 1 hour or until a skewer inserted into the cake comes out clean. Leave to cool before eating.


Friday, January 27, 2012

Rustic White Loaf


This is the first time I have tried making bread using a poolish. It worked out well and is easy to manage- I made the poolish early in the morning before work, then made the bread in the evening so the poolish had a good 12 hours to ferment. You can also leave it overnight. This loaf had a nice flavour and great crust (it erupted!)


Ingredients


Poolish
-50 g strong white bread flour
-50 g rye / whole wheat flour
-250ml water
-1/4 tsp dried yeast


Loaf


-500g strong white bread flour
-1tsp dried yeast
-2 tsps salt
-350ml warm water


1. The night/ morning you wish to bake, mix the ingredients for the poolish together,  cover with cling film , and leave in the fridge for 12 - 24 hours.
2. Dissolve the yeast in the warm water. Mix together the flour, salt, poolish and add the water and stir. Knead for 5 -10 minutes, the dough will come together and form a smooth ball. Leave this covered with greased cling film for 1 h or until doubled in size.
3. Preheat oven to 250C. Take the dough, punch it down and shape it, place in a 500g baking tin, cover with greased cling film and leave for 1 - 2 hours until well risen. 
4. Remove the cling film and bake for 10 minutes at 250C then lower the temperature to 200C and bake for a further 20 - 30 minutes, or until the loaf sounds hollow when tapped. 


Wednesday, January 18, 2012

Roasted Butternut Squash stuffed with Beetroot 'tartare'


This is a simple midweek throw-together dish...

Serves 2

Ingredients

-1 butternut squash, halved lengthways and seeds removed
-2 cooked beetroot
-1 slice feta cheese
-1 tbsp toasted sunflower seeds, or chopped walnuts
-Breadcrumbs
-Sunflower oil
-Seasoning
-Fresh mint to garnish (optional)

1. Preheat oven to 250C. Brush the butternut squash halves with sunflower oil and season. Transfer to a roasting tray and roast until tender - about 30 minutes.
2. Finely dice the beetroot and feta, then mix with the toasted sunflower seeds. Season to taste.
3. Spoon the beetroot mixture into the cavities of the squash. Sprinkle over the breadcrumbs and finish with a drizzle of oil, then return to the oven for 5 minutes. Top with chopped mint.


Enjoy with a green salad or rice/ couscous/ quinoa. 

Tuesday, January 17, 2012

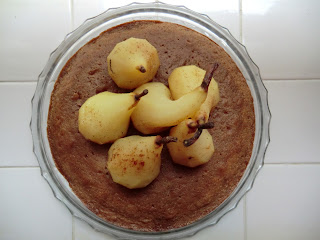
Chocolate Cake with Poached Pears


A thin, vanilla and spice soaked chocolate sponge topped with poached pears. Can be served hot or cold.

Serves 6 -8


Ingredients:


For the pears:


-6-8 pears (I used conference pears, which hold their shape well)
-75g sugar
-1 vanilla pod
-1 clove
-1/2 tsp mixed spice
-1/2 tsp ground cinnamon
-200ml water
-100ml ginger wine


For the cake:
-125g butter, softened
-125g self-raising flour
-125g caster sugar
-3 eggs
-2 tbsp cocoa powder
-50g dark chocolate, finely grated


1. First start with the pears. Keeping the stem intact, carefully peel the pears and take a slice off the bottom so they can stand upright. Using an apple corer and sharp knife, remove the seeds from the centre of the pear, cutting into the pear from the bottom. 
2. In a large saucepan gently heat the sugar, ginger wine, water, vanilla (split) and spices. Lower in the pears, cover, and poach for 15 - 20 minutes or until just tender. 
3. Meanwhile, preheat the oven to 180C. Grease and line a 23cm spring-form tin.
4. Cream the butter and sugar together until light and fluffy. Crack in one egg at a time, mixing well after each addition (adding a spoonful of flour with each egg will prevent the mix from splitting). Finally, sift in the flour and cocoa powder, then fold in with the grated chocolate. 
5. Pour the cake mixture into the tin and spread out to the edges, it will be a thin spreading as this will not be a thick cake. 
6. Bake the cake on the middle shelf for 30 - 40 minutes or until a skewer inserted into the cake comes out clean. 
7. To serve the cake, remove the pears from their poaching syrup and put to one side. Reduce the remaining syrup over a medium - high heat until thickened. Use a fine skewer to pierce the cake all over, then pour over some of the syrup spreading it over the cake as you go. Arrange the pears on top of the cake. 


Can be served with cream, custard or ice cream.


Tuesday, January 10, 2012

Home-made Granola


In line with my 'eat more wholefoods' New Year's resolution, I made this granola to take for breakfast at work during the week. I've been having it with slices of banana and soy milk. 


I've used almonds, hazelnuts, dates, coconut and apricots as the main flavours but you really can add whatever dried fruits and nuts you have to hand. I admit I just saved this batch from burning but it still tastes good :-)


Ingredients:


-300g rolled oats
-100g shelled almonds
-50g hazelnuts
-30g pumpkin seeds
-1 tbsp golden linseed
-1 tbsp wheatgerm
-2 tbsp honey (British / local - save our bees!)
-2 tbsp golden syrup
-2 tbsp apple juice
-2 tbsp walnut oil (or sunflower oil)
-20g toasted coconut flakes
-75g pitted dates, chopped
-75g dried apricots, chopped


1. Preheat oven to 180C and line two baking trays with baking paper.
2. In a small pan, mix together the honey and golden syrup and warm over a low heat. Mix this together with the rest of the ingredients (apart from the dates, coconut and apricots) in a large bowl.
3. Divide the mixture between the two baking trays and spread out. Bake for 20 - 30 minutes until browned and crisped, stirring at 10 minute intervals.


4. Mix with the dates and apricots and leave to cool entirely before storing in an air tight container.


Serve with milk, yoghurt or as a crunchy topping for desserts.


Sunday, January 8, 2012

Yellow Split Pea Soup


This soup is comforting, nutritious and extremely cheap to make. The 500g bag of organic yellow split peas I used cost me just 99p, and the whole soup can't have cost more than £2.50 to make. So it complies with more than one of my New Year's Resolutions- a good start to 2012!


Serves 6 as a starter or 4 as a main course


Ingredients:


-500g dried yellow split peas, rinsed
-1 onion, peeled and chopped
-1 2cm piece of fresh ginger, peeled and finely chopped
-1 small red chilli, seeds removed and chopped
-1 tsp turmeric powder
-1/2 tin coconut milk
-1 litre vegetable stock
-1/2 soy sauce
-Juice of one lemon
-1 tbsp sunflower oil for frying
Seasoning


1. Gently fry the onion, ginger and chilli until soft. Add the split peas to the pan with the vegetable stock and turmeric, and simmer for 30 minutes or until the split peas are tender but still with some bite to them. You may need to top up with water as the peas cook. 
2. Remove 1/3 of the split peas from the pan and put to one side. Purée the rest using a hand blender (or transfer to a food processor). Pour the reserved split peas back into the pan.
3. Stir in the lemon juice, coconut milk, and soy sauce then season to taste.


Serve with chunky bread and a swirl of yoghurt if liked.